About this application
This is a Modbus Master application that allows you to perform Modbus RTU serial communication on a web browser without installing any applications on your PC.The currently supported Function Codes are as follows:
- 0x01 (Read Coils)
- 0x02 (Read Discrete Inputs)
- 0x03 (Read Holding Registers)
- 0x04 (Read Input Registers)
- 0x05 (Write Single Coil)
- 0x06 (Write Single Register)
- 0x0F (Write Multiple Coils)
- 0x10 (Write Multiple registers)
How to submit requests to the devices?
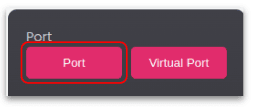
Open a serial port
- Clicking the Port button in the upper left corner of the screen will bring up a list of serial ports recognized by your system.
- Select the serial port you want from among them.
- Below that, set the options for the serial port.
- Click the Open button.
 If you are using a Linux environment such as Ubuntu or Debian, please run the following command to enable access to the serial port.For example:$ sudo chmod o+rw /dev/ttyUSB*
Add requests
- Click the plus button at the bottom of the Request area.
- Type a Request name, set the options, and click the Add button.
- Then it will be added to the request list.
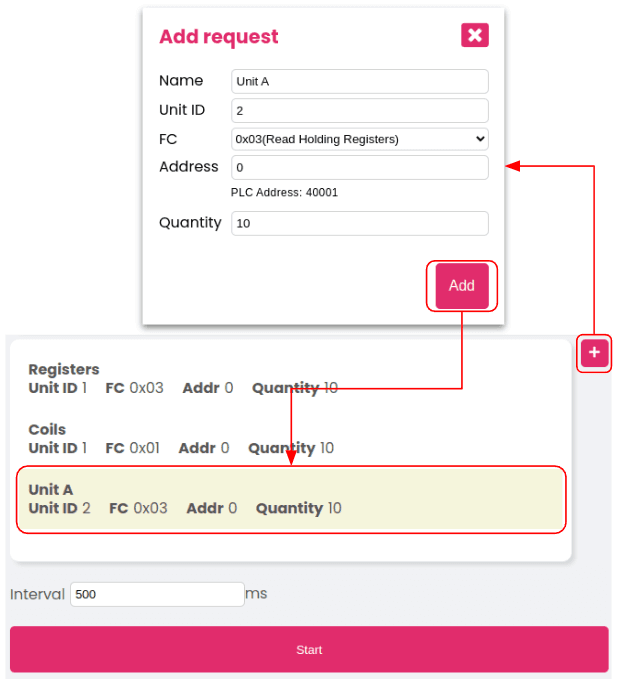
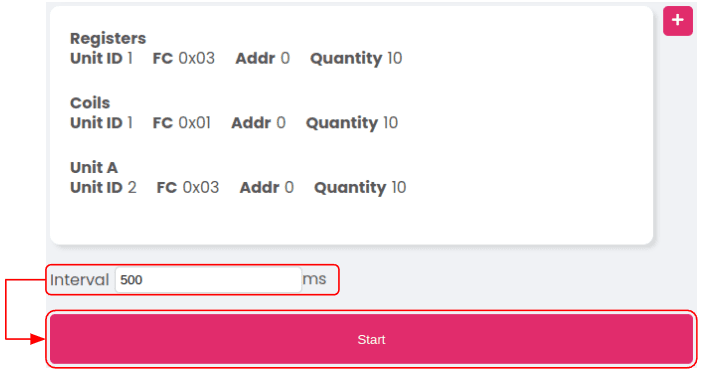
Submit
- Set the options.
- The minimum interval value is 100ms.
- Click the Start button.
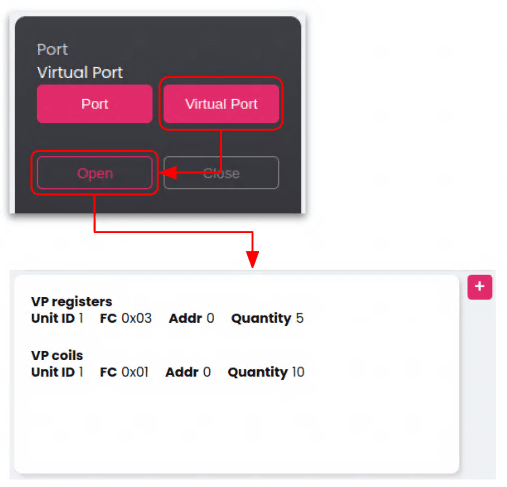
When to use Virtual Port?
Virtual Port
- If your system does not have a physical serial port, you can open a Virtual Port that acts like a physical device to use the application.
- This feature is for learning how to use the application.
- Click the Virtual Port button, then click the Open button to use it.
- Then, you can add the requests you want.
How to monitor the received values?
Communication
Clicking the Start button will send a request to the device and the transfered and received chunks will be displayed in the Communication box. By default, it will display in hex.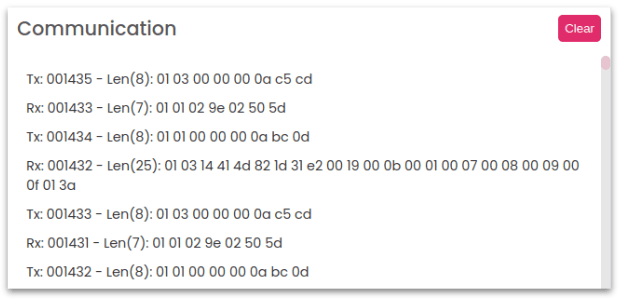
Tag Table
When you select a request, you can see the real-time values of the tags of the selected request and set the properties of each tag.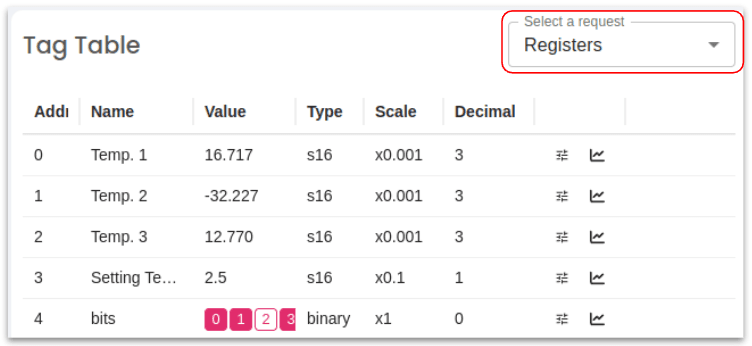
Table - Tag config
You can set the name and display format of the value by clicking the Tag config icon at the right end of each item in the table.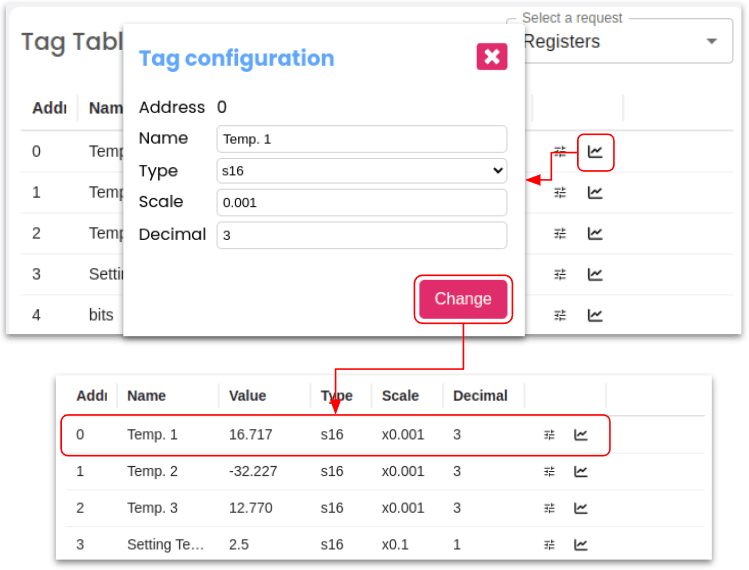
Chart
Clicking on the chart icon at the end of each item in the table will add it to the chart located at the bottom of the screen.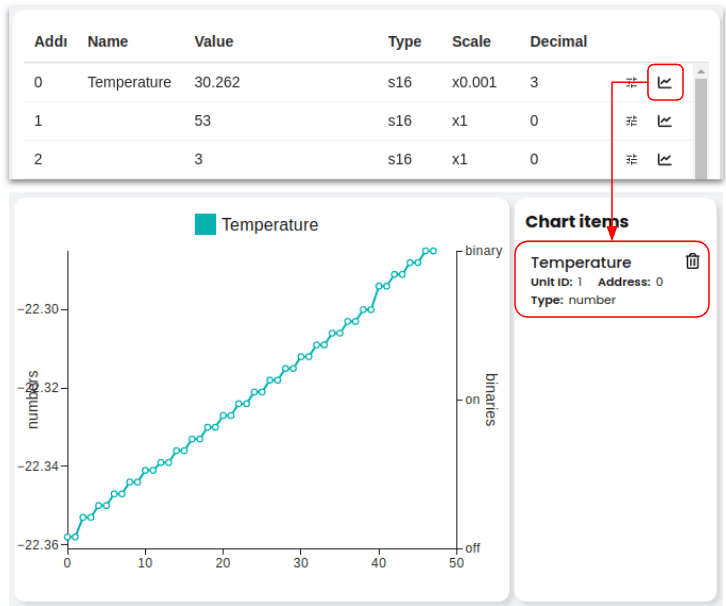
How to change a value of the tag?
Change registers
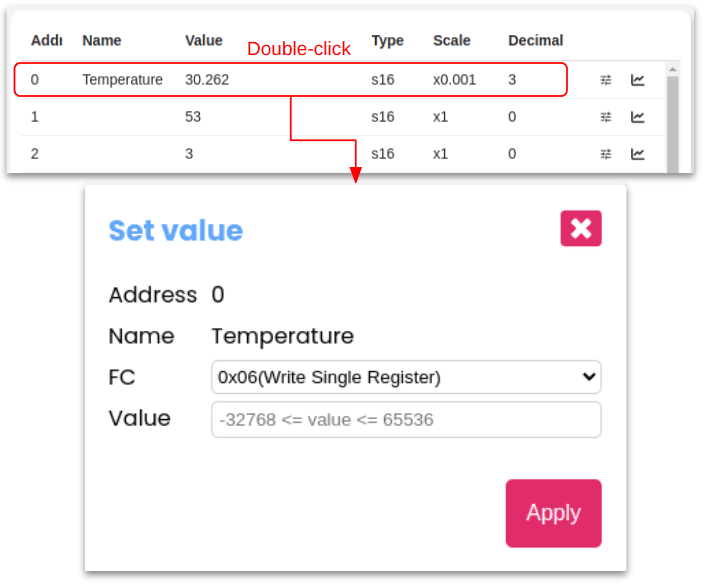
- Double-clicking an item in the table view for which you want to change the value will bring up a dialog where you can change the value.
- Then you can set the function code and value.
- If you select function code 0x10 (Write Multiple Registers), enter the values separated by spaces.
Change coils
Just like when changing a Register, when changing a Coil, you can change the value by double-clicking on the item you want to change the value of.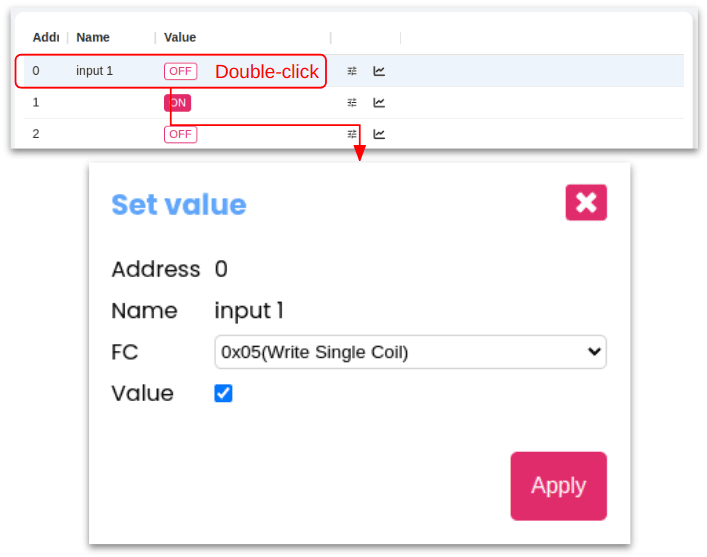
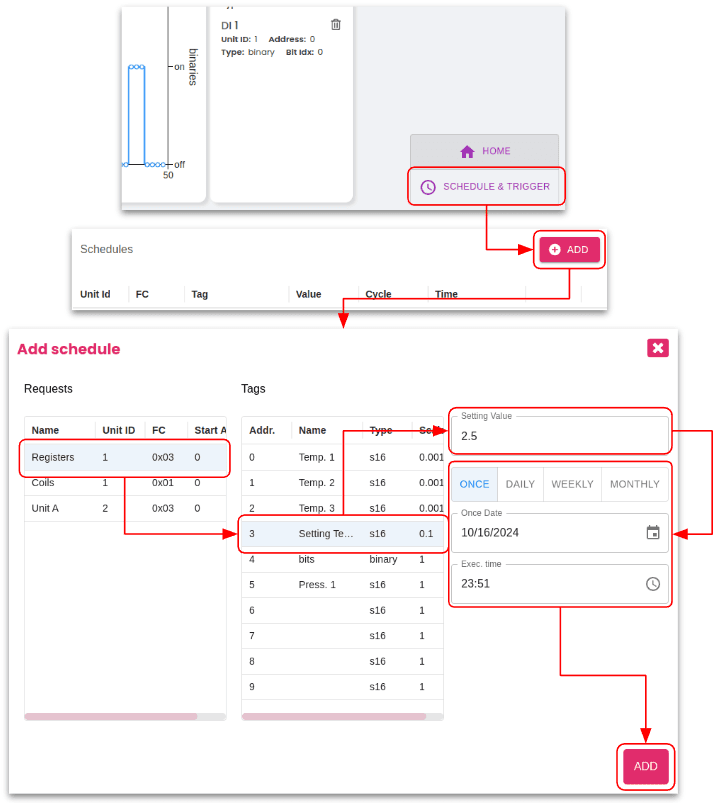
Schedule
This app provides a schedule feature that allows you to change the value of a specific tag at a specified time.The schedule only works while polling.
Add schedule
- Click the SCHEDULE & TRIGGER button at the bottom right of the screen.
- Click the ADD button in the Schedule area.
- Select the Request that contains the tag whose value you want to change.
- Select the tag whose value you want to change.
- Enter the settings and set the time when the schedule will run.
- Click the ADD button.
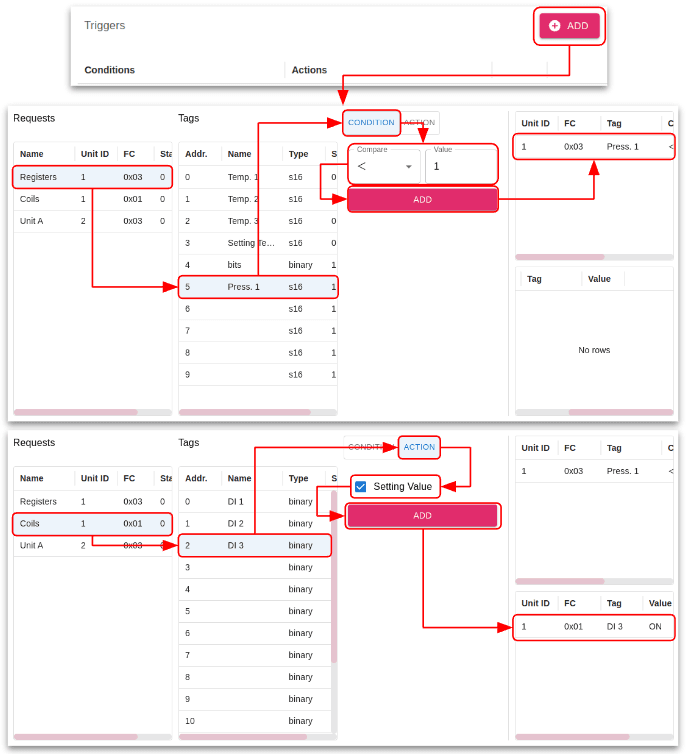
Trigger
This app provides a trigger feature that can change the values of specified tags when certain conditions are met.The trigger only works while polling.
Add trigger
- Click the SCHEDULE & TRIGGER button at the bottom right of the screen.
- Click the ADD button in the Trigger area.
- Select the Request and Tag for which you want to check the conditions.
- Click the CONDITION button and set the condition and click the ADD button to add the condition.
- You can add multiple conditions. In this case, the trigger will fire only if all conditions are met at the same time.
- Select the Request and Tag whose values will change when all conditions are met.
- Click the ACTION button, enter the settings, and click the ADD button to add the action.
- You can also add multiple actions.
- Finally, click the ADD button to add the trigger.
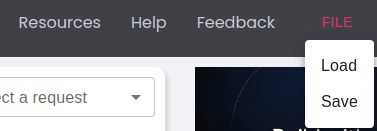
Save & Load
All settings in the app are automatically saved when you refresh or close the page, but you can save or load them to a file via the FILE menu in the upper right corner of the screen.